Wednesday, 25 February 2015

Freebies : Blogskin Page

18 Comment(s) so far

Assalamualaikum and hello everyone..Like what I had promised on my previous post, I'm gonna give a blog page for a blogskin as a freebies for you guys...

This is how the skin look


I type the code all by myself and it took me a long time to finish coding it.. So, I hope you guys will appreciate my effort and follow below rule before using this skin..

The Rules :
My first blog skin preview skin... hope you'll like it...don't remove the credit ! don't use this skin as a base code! don't copy anything in this skin without proper credit...
Edit this skin as much as you want as long as the credit remains...

How to use this skin?
Firstly make a new Blog skin blog...Then, revert the blog into classic template (at the bottom of template page) Then, copy and paste the code of this skin into the template code box...
Lastly,preview and save...

How to Edit this skin ?
Click ctrl + F on your keyboard and search for
IMAGEURL then, replace the text with your blogskin thumbnail URL
TITLE then, replace the text with your blogskin name
DESCRIPTION then replace the text with skin description
PREVIEWURL then replace the text with your skin preview URL
POSTURL then replace the text with skin entry URL

Do comment if u are using this skin

Monday, 23 February 2015

My Graphic Arts

Be the first to comment!
Creepy Cake with creepy handwritten

Because I'm hungry right now and want to eat something sweet.. ^^
Assalamualaikum, selamat petang and hi guys and babe...7 more days till SPM result... <(=,=">
In case I have a lot of free time right now before I further my study to a high school later, I have filled some of my leisure time to draw doodles using Paint Tool Sai app..

I'm still in a beginner level of doodle artist since I'm lack of experience in drawing or coloring doodle..There's some doodle that I want to share with you guys and maybe it will become a photo memory when I'm become an expert in graphic designing one day...( well who knows right ? )

Chocolate ice cream with hazel nut and chocolate sauce ;-p

You can take this if you want because I forgot to add watermark

Beginner level of chibi making

Girl wearing 'peplum' dress ( How to spell peplum? )
Latest artwork..

I draw all the doodle using mouse except the last one.. I draw the sketch in a paper first then I redraw the line using paint tool sai...So how? leave your comment okay...Right now I'm planning to draw my own doodle to be use as my blog header...
I also planned to make a new blog page that can be use as a blog skin gallery as a freebies for you..so, coming soon..Okay see you next time... ( waving hand )

Tuesday, 17 February 2015

Customize search box 2

8 Comment(s) so far

This is a tutorial on how to customize search box mine version..Actually many people ask me in ask.fm for this tutorial...Sorry for the late update..

For template designer :
www.blogger.com --> layout --> add gadget --> HTML/Javascript

For blogskin :
www.blogger.com --> template

Preview

Copy the code below :

<br /><center>
<form action="/search" id="searchThis" method="get" style="display: inline;">
<input id="searchBox" name="q" onblur="if(this.value=='')this.value=this.defaultValue;" onfocus="if(this.value==this.defaultValue)this.value='';" style="background:#FFFFE5; border-bottom-left-radius: 10px 10px;border-top-left-radius: 10px 10px;border: #FFEEEE solid 3px;color: #666666; font-size: 11px;font-family:century gothic; width:135px;padding:3px;padding-left:5px; " type="text" value="Enter some keyword" vinput="" /> <input id="searchButton" style="background:#FFF7F7;border-bottom-right-radius: 10px 10px;border-top-right-radius: 10px 10px; border: #FFEEEE solid 3px;color: #444444; font-size: 11px;font-family:century gothic;padding:2px;width:50px;" type="submit" value="Search" /></form>
</center><br />

For template designer : Paste the code in the HTML/Javascript box...
For blogskin : Paste the code everywhere you want it to appear in your sidebar code...
The Notes :
Blue text : Background and border color
Fuchsia text : Font color
Red text : Width of search box
Purple text : Text on search box and button

..........................................................
PREVIEW AND SAVE
Kalau tak faham tanyalah
..........................................................

Tuesday, 3 December 2013

Hide music player 3

4 Comment(s) so far


Assalamualaikum and hello everyone ! we meet again in my new tutorial post...this is my third hide music player tutorial...ask for my permission first if you want to copy this tutorial...I got this tutor from tumblr if I'm not mistaken the URL is tumblings.net ( I'm not sure ) but, I have edit the code almost 70%

https://blogger.googleusercontent.com/img/b/R29vZ2xl/AVvXsEi8tnjWxmclvbg337vh9N8TncDYpjsHuytRpA_b0-7NotOd9m5H8XzCV1gWvv2_8mAw1_dJLjj4rQIcseWIz73Kb66Uh__5JVeeeq4-lhVA5mMphF3fQkFg23urpGYduOQM_pdg_mZ3sPdR/s1600/kawaiilady.b.com.png


Firstly : for template designer , denim , simple ,watermark...
Dashboard --> Layout --> Add gadget --> HTML/Javascript

Firstly : for blogskin , classic template...
Dashboard --> template --> paste the code after  </style>

The codes :


<style type="text/css">
#music-player-rounded {
  position:fixed;
  left:30px;
  top:5px;
  width:25px;
  height:25px;
  padding-left:10px;
  padding-top:10px;
  background-color:#FFFFFF;
  -moz-border-radius:100px;
  -webkit-border-radius:100px;
  border-radius:100px;
  border:3px dotted pink;
  opacity:1;
  -webkit-transition: all 0.4s ease;
  -moz-transition: all 0.4s ease;
  transition: all 0.4s ease;
}
#music-player-rounded:hover {
  -webkit-transform:rotate(360deg);
  -moz-transform:rotate(360deg);
  -o-transform: rotate(360deg);
  left:50px;
  top:30px;
}
.music-player {
  margin-top:-10px;
  margin-left:-55px;
  width:25px;
  height:25px;
  padding-left:10px;
  padding-top:10px;
  background-color:#FFFFFF;
  -moz-border-radius:100px;
  -webkit-border-radius:100px;
  border-radius:100px;
  border:2px solid #dddddd;
  color:#777777;
  opacity:0;
  overflow:hidden;
  font:12px Arial, Calibri, Cambria, sans-serif;
  -webkit-transition: all 0.4s ease;
  -moz-transition: all 0.4s ease;
  transition: all 0.4s ease;
  }
#music-player-rounded:hover .music-player {
  opacity:1;
}
.music-player-embed {
  margin-left:-115px;
  margin-top:3px;
}
</style>

<div id="music-player-rounded">
<img src="http://media.tumblr.com/tumblr_lm6prnRzP61qfoi4t.gif" />
<br />
<div class="music-player">
<div class="music-player-embed">
MUSIC CODE HERE
</div></div></div>

The notes :

Red text : Color code HERE
Orange text : Width and height of the music player before and after hover
Blue text : Music icon URL can be find HERE
Fuchsia text : Music player code use billy player find music HERE

Alert this :

1.  Don't put title on your music player
2.  Change the width of the player from 200 to 370
example :
<embed align="middle" height="10" name="billy" quality="high" src="http://www.sheepproductions.com/billy/billy.swf?autoplay=true&amp;f0=http://a.tumblr.com/tumblr_lwve08PUhx1qdjl89o1.mp3&amp;t0=&amp;total=1" type="application/x-shockwave-flash" width="370" wmode="transparent"></embed></div>

Ok thats all...Kalau tak faham tanyalah...see you again in my next post..btw, I don't take banner request anymore... PLEASE COMMENT AND RATE THIS SKIN... \(u,u\) thanks...

Friday, 29 November 2013

Circle hover effect

3 Comment(s) so far

Assalamualaikum and heyyo eberybuddy... ^^,
Harinie saya nak buat tutorial pasal circle hover macam tempat saya letak ask.fm tu...sebenarnya saya tak nak buat tutorial pasal apa yang saya letak kat blog nie sebab takut nanti ada pulak klon blog nie...tapi, kesian pulak dengan orang yang ada request pasal tutorial nie kat ask.fm...


This is a tutorial about circle hover effect ( rotate , scale , opacity )


For template designer :
www.blogger.com/home --> Layout --> add gadget --> HTML/Javascript

For blogskin :
www.blogger.com/home --> Template --> Paste it anywhere you want it to appear

The Code

<style type="text/css">
.navs {
width:100%;
height:100%;
margin-top:10px;
text-align:center;
border-radius:50%;opacity:0;
 -webkit-transform: scale(0) rotate(-360deg);
 -moz-transform: scale(0) rotate(-360deg);
 -o-transform: scale(0) rotate(-360deg);
 -ms-transform: scale(0) rotate(-360deg);
 transform: scale(0) rotate(-360deg);
background-color:white;
background-image:url(https://blogger.googleusercontent.com/img/b/R29vZ2xl/AVvXsEgwmeNLJCwEVfkpU65-Oc2Z6GsYSsEQX2XmDsEMl9CDDbiWLO6thjewFqxfbvkPNxZvveM26Bq9iX4DNrf34ame28IbAbTtTNM52vCDKBHAlgee0DpZ_CJRrAFEeT7R1t_pikVh3OvTVRs/s1600/spotty-pink-background-seamless.jpg);
 -webkit-transition: all 0.4s ease-in-out;
 -moz-transition: all 0.4s ease-in-out;
 -o-transition: all 0.4s ease-in-out;
 -ms-transition: all 0.4s ease-in-out;
 transition: all 0.4s ease-in-out;}
.navs a {
color:white;
}
.outside:hover .navs {
opacity:1;
 -webkit-transform: scale(1);
 -moz-transform: scale(1);
 -o-transform: scale(1);
 -ms-transform: scale(1);
 transform: scale(1);
}
.outside {
height:250px;
width:250px;
border-radius:50%;
 box-shadow:
  inset 0 0 0 15px rgba(255,255,255,0.6),
  0 1px 2px rgba(0,0,0,0.1);
-webkit-transition: all 0.4s ease-in-out;
 -moz-transition: all 0.4s ease-in-out;
 -o-transition: all 0.4s ease-in-out;
 -ms-transition: all 0.4s ease-in-out;
 transition: all 0.4s ease-in-out;
}

#outside1 {
background-image: url(http://wallpapers.avantzone.com/data/media/102/Forever_Friends_14.jpg);
background-position:50% 50%;
background-size:330px;
background-color:#FFFFFF;
}
#outside1:hover {
box-shadow:
  inset 0 0 0 0px rgba(255,255,255,0.6),
  0 1px 2px rgba(0,0,0,0.1);
}
</style>
<center><div class="outside" id="outside1"><div class="navs">
ANYTHING HERE
</div></div></center>

The Note
Blue text : Background image URL find at Google
Fuchsia text : Width and height
Orange text : Color code Find Here
Red text : Put anything you want

Preview and save when done...comments are really appreciated...

Btw, I have update my old blogskin... Blogskin : I'm Rilakkuma , Blogskin : Blue wonderland

Wednesday, 27 November 2013

Basic thing in editing blog

Be the first to comment!
http://melissagoodsell.typepad.com/.a/6a00d83451d02f69e201538ffa951d970b-800wi

Assalamualaikum and hello everyone... \o/ actually I've been thinking of making a tutorial about this since a long time ago...But, only now I have the the diligence to write this entry...

This tutorial are for template designer like simple, watermark , awesome or etc

Before editing blog, you must log in to your Blogger account with your username and password. Once you are logged in, make sure you are at your Blogger's Dashboard, otherwise click on the "Dashboard" link, which will take you to a list of your blogs.
If you don't have any blogger account, sign up first

How to add widget / gadget ?

1.   Go to blogger dashboard

     
2.   Access the Layout page of your blog


3.   Click on add a gadget


4.   After you click on add a gadget,a pop-up will appear...


5.   Save your widget


6.   Add a custom widget to Blogger using the HTML and JavaScript widget.


7.   Add HTML/JavaScript code to the box
You can ignore the title field if you don't want to add title


How to edit code ?

1.   Go to blogger dashboard


2.   Access the Template page of your blog


3. Click on Edit HTML button under the "Live on blog" view


4.   Save when done editing
Click save template to save
Click Preview template to preview
Click Revert changes to cancel changes made


How to find code ?

1.   Click on the template box code


2.   Hit the "Ctrl" key (lower left area of your keyboard) AND the letter "F" key at the same time (simultaneously)


3.   A little pop-up window will appear.
Write the keyword that you want to find in the search box then press "enter"


How to copy code ?

1.   Highlight the word that you want to copy
To highlight text using your mouse, position your cursor at the beginning of the text you want to highlight.
Press and hold your primary mouse button (commonly the left-button) until the end of the text.


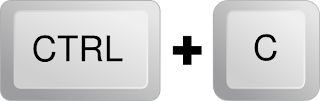
2.   Hit the "Ctrl" key (lower left area of your keyboard) AND the letter "C" key at the same time (simultaneously)


How to paste code ?

1.   Hit the "Ctrl" key (lower left area of your keyboard) AND the letter "V" key at the same time (simultaneously)


Well, I think that all the basic things you should know in editing blog...
If you have any problem with this post just ask me by leaving a comment...